BASIC MAPPING IN RADIANT
Welcome to my little mapping tutorial, I have made this in like 10 minutes and if you have something to it I might create more on howto compile your map and run it ingame. This tutorial goes on about the basics of mapping with brushes so this does not include compiling or lightning or any fancy stuff just brushwork lets start
Okay the first thing I want to teach you is the basics of GTKRadiant lets start off with the key shortcuts and combinations lets see Im going to make a small list of keys wich you will need the most during the creation of your map
· Ctrl+Tab = Switches views from X to Y to Z and back to X.
· Escape = Deselect anything you might have selected.
· Click+Drag = Drags you a brush if you have nothing selected.
· Click+Drag = If you have selected a brush you can scale it.
· Shift+Click = Selects a brush or entity
· SpaceBar = Clones the object selected
· E = Edges tool to move the edges of a brush
· V = Vertex tool to move the vertexes of a brush
I guess that concludes the most important keys and combinations for you to use.
Lets continue with the actual map building process shall we…
Well here you see the basic mapping area the big white box is where you can swich between X,Y,Z viewports and where you can drag new brushes and move brushes and last but not least scale them.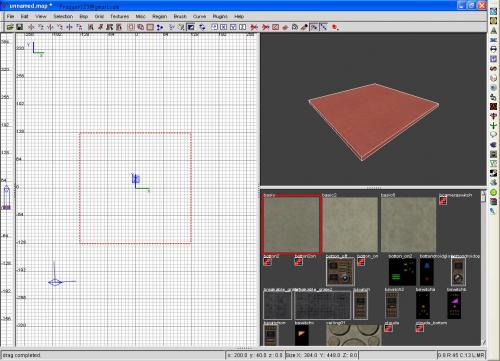
Now that wasn’t to hard was it ? lets move on the the next step..
If you want a room start by changing the view by hitting Ctrl+Tab now click above the brush we already have and drag your mouse up to make the brush into a square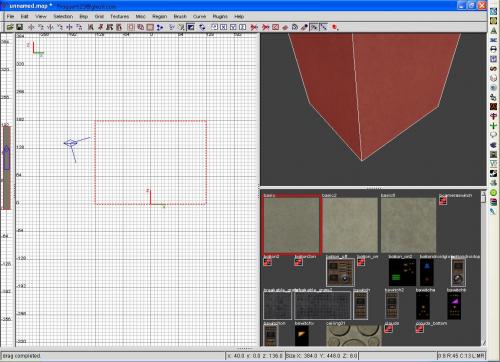
Ok that is done lets get on with it..
Ok while still having the brush selected hit the hollow button youll see that I have marked it well sorry but I have marked 3 buttons ![]() anyway it is the one centered in the marking with the little square in it just click that and your set with your first room
anyway it is the one centered in the marking with the little square in it just click that and your set with your first room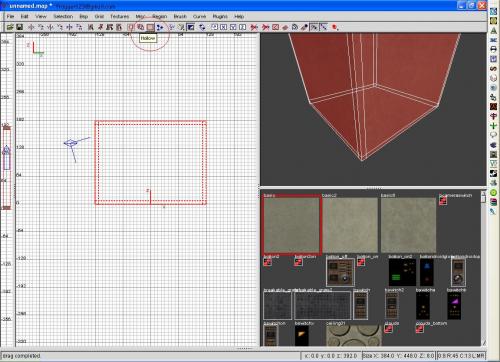
Congrats J your first room is done now lets move on and decorate it a little but with some detail brushes and lets take a first step towards patches
If you hit Escape so that you will deselect the room’s walls and make a new brush along one of the walls and scale it down a little bit and make it align against the wall all the way from the beginning to the end. Now well see that if you have a detailed texture selected( for example the one I have selected you can see it has a red border in the texture browser) anyway you can see that it does not fit nicely onto the brush what you want to do is this scale the brush back down as small as in the image and then press S to let the surface tool come up and click the Fit button now rescale the brush back to its original position and you will see that it fits nicely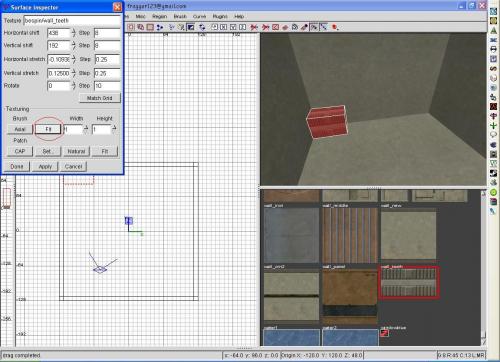
that was your first step with texture alignment J good job if you have pulled it off.
Next on is the manipulation of a brush lets start out by making a small brush like I did on the image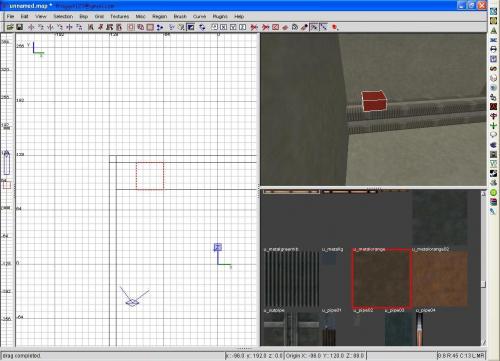
Once you have done that hit E and click on the blue dots and drag them one grid unit towards the middle now change the view with Ctrl+tab and do the same thing again youll notice that you have made a little pyramid shape brush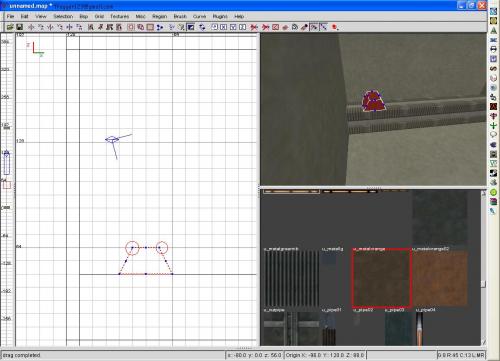
if you have finished something like this will come out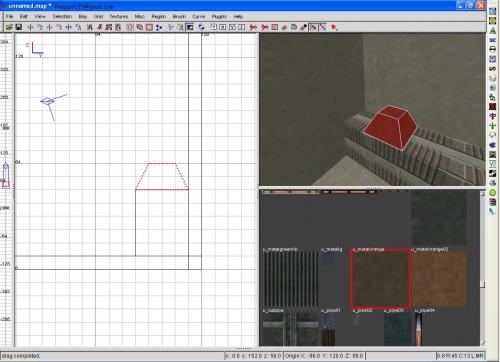
Now lets just deselect the brush and make a new one on top of it like I have done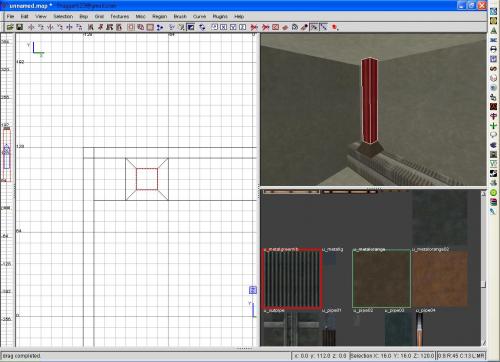
now lets make that a cillinder make sure you are in the top view and go to Curve>Cilinder and click that youll notice how it changes shape from squaresih to cilindrical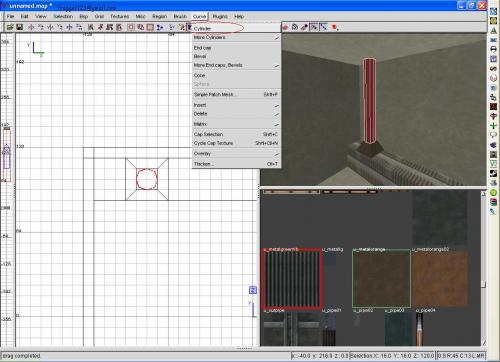
Good job your first patch is made ![]() now lets move on to cloning it
now lets move on to cloning it
Just select your patch and the piramide shaped brush and hit the spacebar and your all done now click on either one of them and drag them so that it evenly spaces
Now lets make some pyramid shaped brushes on the top of the pillars…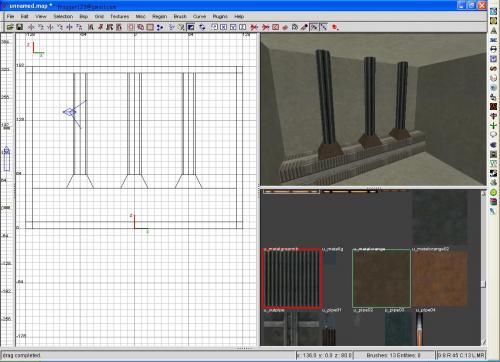
Lets start by deselecting everything by hitting Escape now select all three the pyramid shaped brushes and hit the space bar then click the Z|Z button on the top right and move it so that it looks nice
So that concludes it for this part of the tutorial I hope you have learned something with it and if you have any last questions feel free to email me at fragger123[at]gmail.com
Greetings Tim aka FraGGer
Peace..